How to buy WordPress Hosting in SeekaHost.app WP Services Platform and 1-Click Install on a domain?

WordPress hosting at SeekaHost.app is the best to launch your WordPress blog or site. In this tutorial, I will share a guide on how you can purchase WordPress hosting via SeekaHost.app and install it on your domain in one click.
Starting a WordPress blog requires a domain name. I will show you how you can register a domain using SeekaHost.app and then host your website on it.
About SeekaHost
SeekaHost is for those who are seeking cheap domain and hosting prices. You can easily get your domain and hosting purchase with a business email and an SSL certificate.
The plans are affordable and scalable. You can upgrade or downgrade your hosting plans as per your budget and requirement. Every plan offers reliability, speed, and security.
Different hosting services offered by SeekaHost.app include Personal & business web hosting, WordPress hosting, VPS, and Dedicated Servers. And of course, you have the cheap domain registration, email hosting, and SSL certificate.
Learn how to register a domain and buy WordPress hosting using SeekaHost.app WordPress hosting control panel.
First, let’s check out its WordPress hosting plans.
SeekaHost WordPress Hosting Pricing & Plans
You can first decide your budget and other requirements. Out of four WordPress hosting plans, you can choose anyone. The four plans offered by SeekaHost.app include Starter, Standard, Growth, and Premium.
You can buy any WordPress hosting using the SeekaPanel and launch your blog with one click.
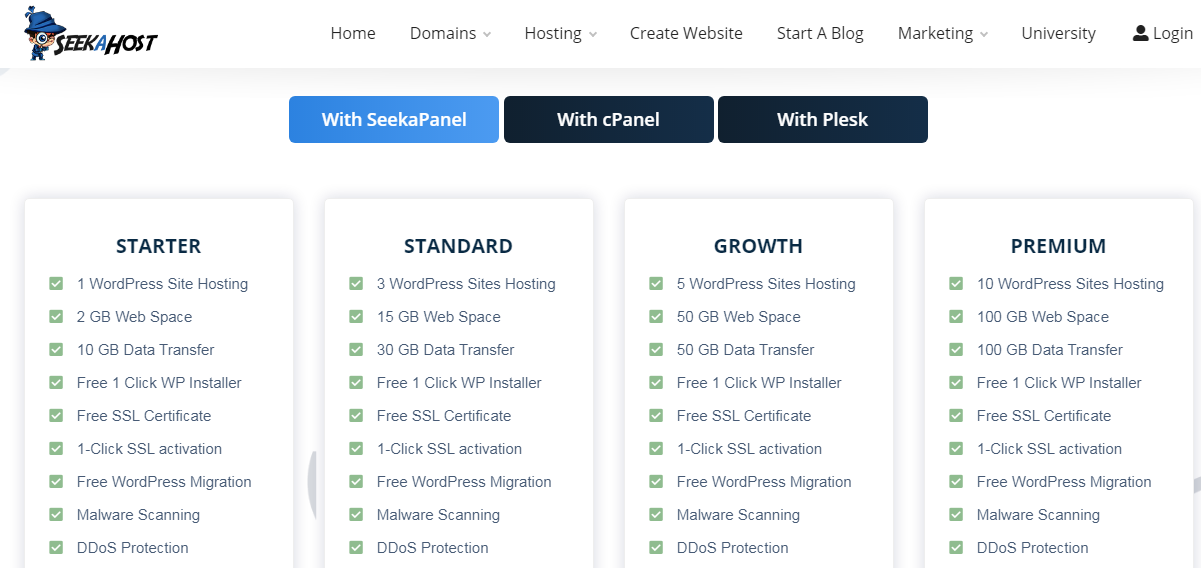
Starter: Starting at $1.49/month, the plan allows a single website, and is annually billed at $12. It has a one-click WP installer, 2 GB disc space, 10 GB bandwidth, DDoS protection, and a free SSL certificate with 1-click installation. Support is not included in this plan.
Standard: This plan starts at $5.50/month and is suitable for those who have more than one website. The plan offers all the Starter plan features. Along with it, the plan includes 15 GB of disc space and 30 GB of bandwidth. With this plan, you can run up to 3 websites.
Growth: At $8/month, this plan allows you to run up to 5 websites. The plan offers 50 GB of disc space & bandwidth and has all the features that come along with the Standard plan.
Premium: Starting at $12/month, the plan allows you to run up to 10 websites. It includes 100 GB of disc space and 100 GB of bandwidth. The plan offers both WordPress support and remote support.
How To Start a WordPress blog with SeekaHost.app?
To start a WordPress blog via SeekaHost.app, you need a new or existing domain. You will then need a WordPress hosting plan to run your website. Let me show you the steps to register a domain and then purchase an affordable WordPress hosting plan.
How To Register a Domain at SeekaHost.app?

For starting any WordPress blog or a website, you need a domain name. Your domain name is your identity on the internet, hence make sure you choose the right domain name.
I hope you have done your research on how to find a good domain. Let’s check out the steps to register your dream domain quickly.
Quickly enter your preferred domain name and click on the Search button. The system will search for the domain availability and show you the results.
If the domain you were looking for is available, click on Add To Cart.
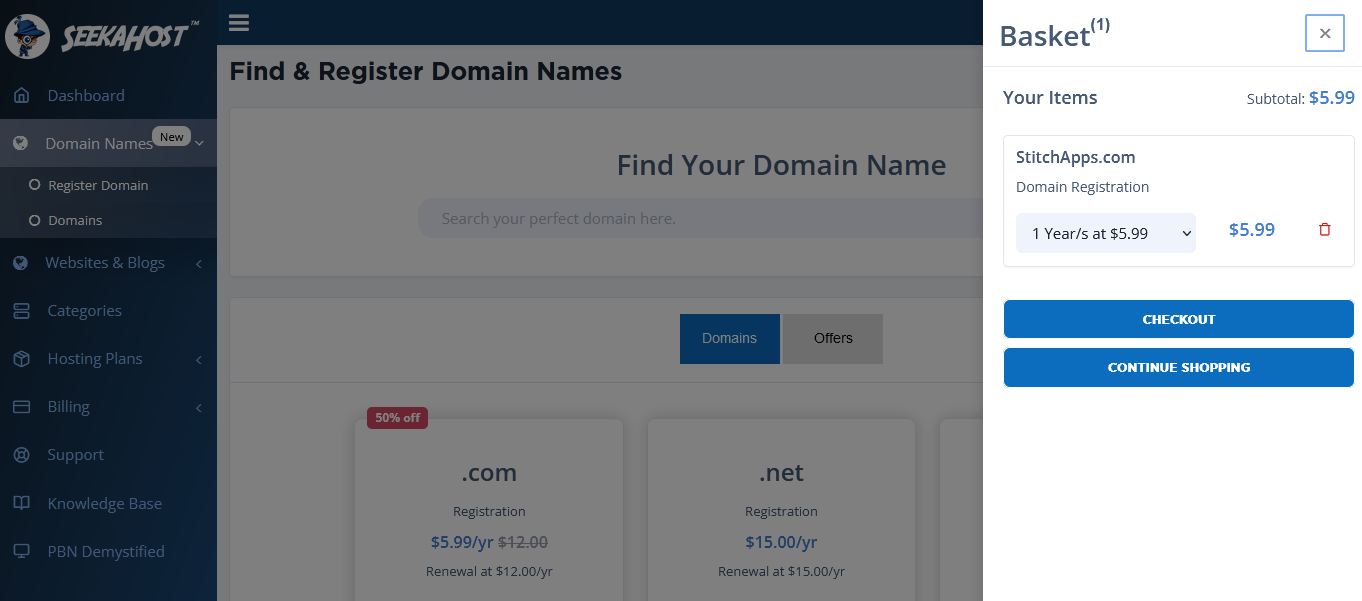
Your domain gets added to the basket. Now check the price, it should be $5.99 per year. You can increase the number of years and the so the cost will increase.
Go to the basket and click on Checkout. Or you can continue shopping for more domains.
Next, enter your personal information and proceed with the domain payment.
You can choose to pay via Credit card or PayPal.
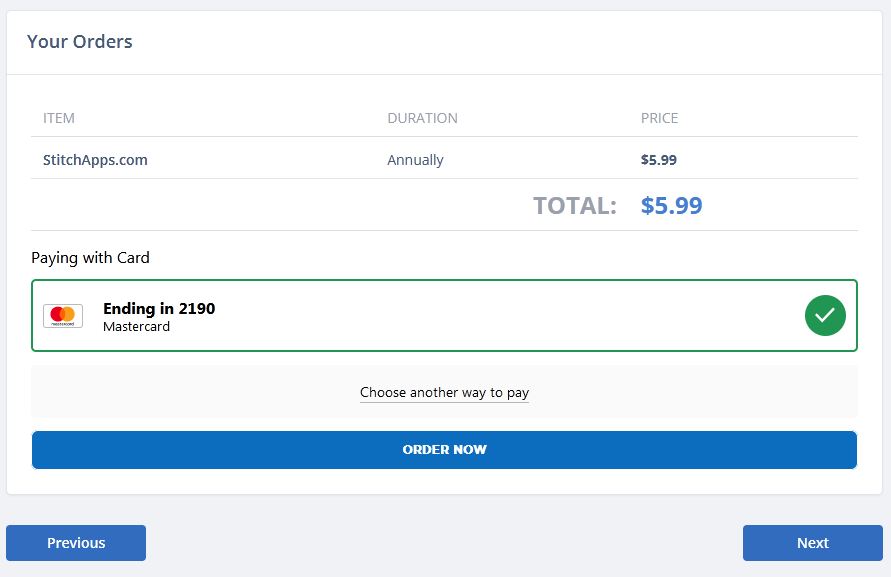
Finally, click on Order Now and complete the payment. If the order is confirmed, you will find the below message.
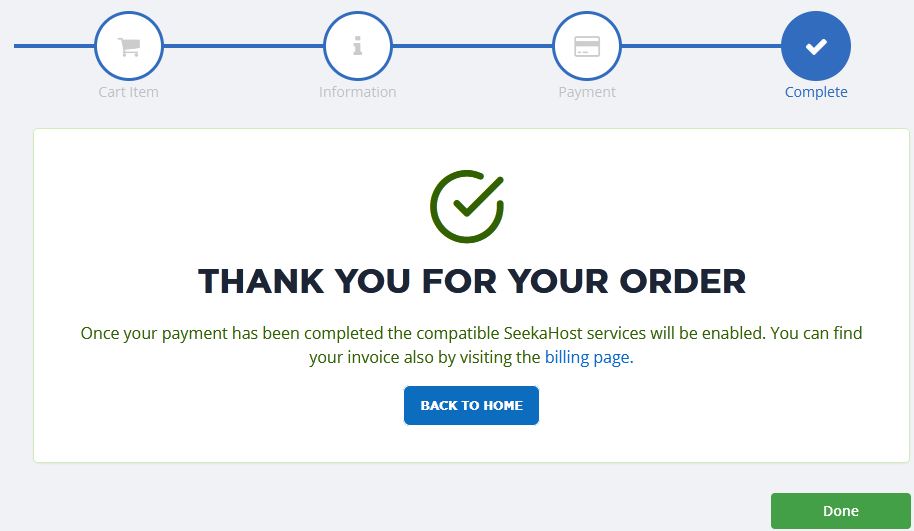
With a domain name registered at SeekaHost.app in simple steps, let’s proceed with the hosting purchase.
How To Buy WordPress hosting plan at SeekaHost.app?
As already shown in the previous section, there are four WordPress hosting plans that you could choose.
To purchase any WordPress hosting plan, go to Plans > WordPress Hosting and choose one of the plans.
Click on Buy Now and choose to pay either monthly or annually.
Check the total billing for monthly and annual payments. Once you are confirmed which one to choose, click on Continue to Subscribe.
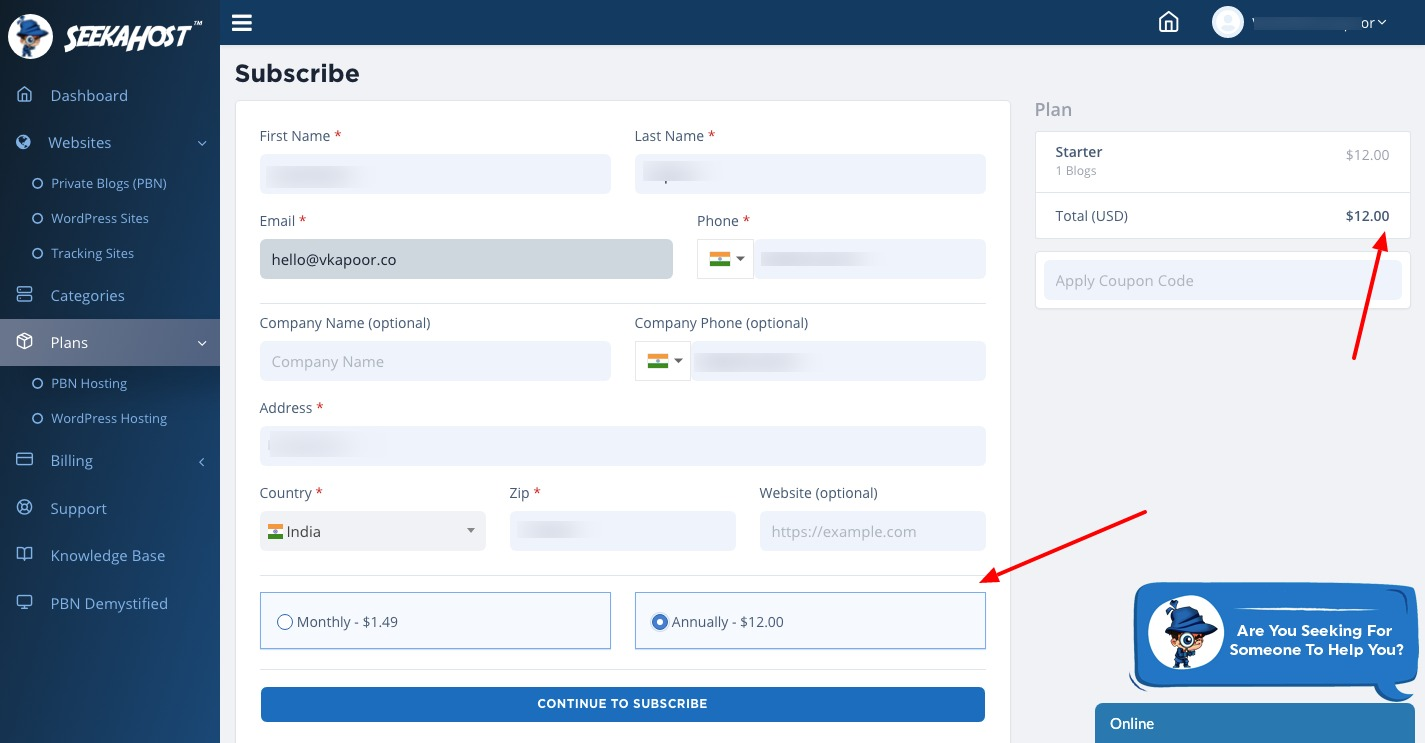
You can pay for the hosting plan using the same method you used for domain purchases.
So now you have a domain and a WordPress hosting plan. This is the simplest way you can buy both products using one dashboard via SeekaHost.app control panel.
Let me show you how you can go live with your first blog post.
How To Start a WordPress blog?
Since you have a WordPress hosting plan, you can go to WordPress sites and click on Create new WP Site.
At one click your WordPress site is ready. Simply enter the domain and title, and your WordPress blog is ready.
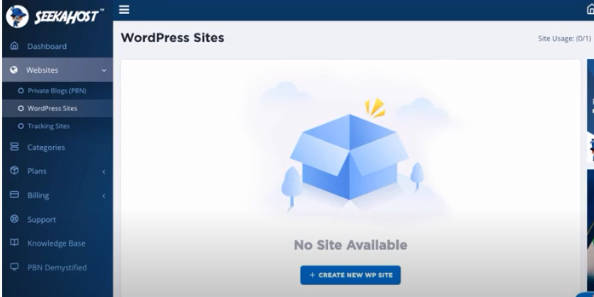
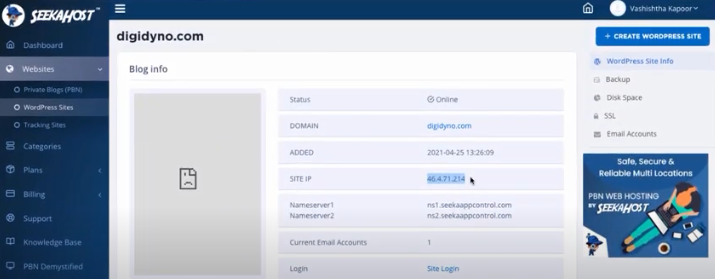
Your site is live and active but the nameservers need to be changed. You need to point your domain nameservers to SeekaHost WordPress hosting.
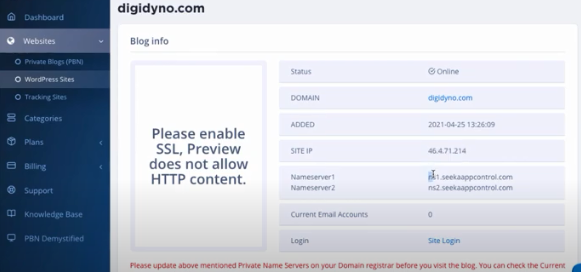
Copy the two nameservers ns1 and ns2 as shown in the image above.
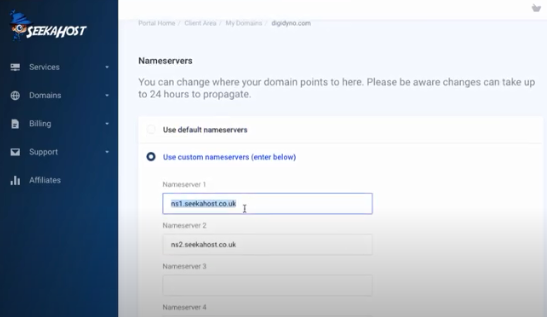
To change your domain nameservers, go to Domains and settings. Then go to Nameservers, and click on Change Nameservers.
Choose custom nameservers and paste the two nameservers that you had copied.
Your site is now live and ready to start publishing your first blog post.
You can now log in to your WordPress dashboard. Your WordPress login credentials can be found in your email. From there, you can get a WordPress username and password.
Once logged inside your WordPress site dashboard, you can install a WordPress theme and required plugins.
To start writing your first blog post, Go to Post > Add New and write your blog post.
That’s it!
Start your WordPress blog with SeekaHost.app WordPress hosting in less than 10 minutes.
Conclusion
I hope you understood the steps to register a domain and then purchase a WordPress hosting plan via SeekaHost.app control panel.
Start your first WordPress blog with SeekaHost.app and rule the internet with your fascinating articles.
