Looking for how to register a company in Sri Lanka and if you can do it all online?
In this guide, you will learn it.
If you have not read the previous article, you can read about it how to start an online business in Sri Lanka.

Sri Lanka lies nestled on one of the world’s busiest shipping routes. The port of Colombo alone has an annual cargo freightage of 31 million tonnes.
Sri Lanka also has a rapidly growing economy — which is why quite a few foreign nationals (frequently those from India and the Middle East) choose to register their companies in Sri Lanka.
How To Register A Company Online In Sri Lanka
1. Check If Your Company Name Is Available
A no-brainer really, but it might surprise you to know that there are actually businesses in the business of buying and selling names of companies (and websites too).
Better safe than sorry, as they say. Head on over to this site to check if the name you’ve chosen for your business is available.
You will be allowed to access this portal of the website without an account. The process is as simple as typing in the desired name in the search bar. For example:
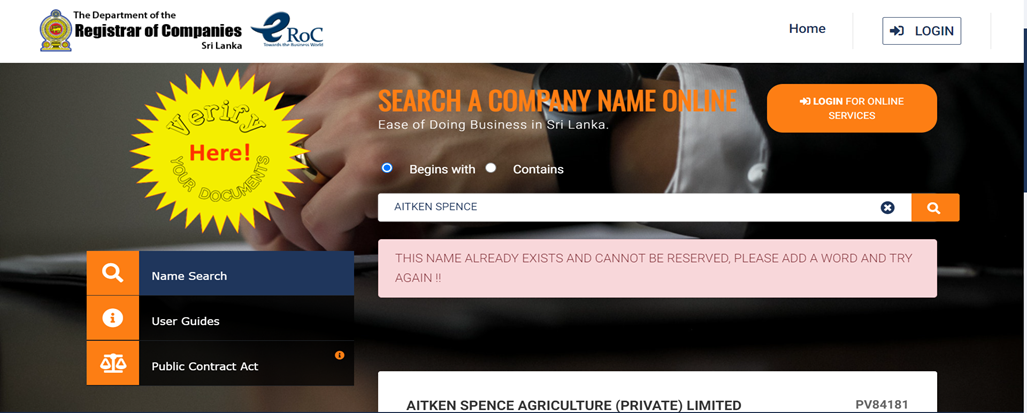
You enter the company name and hit “enter”. If the name is unavailable, a
message like the one will be displayed.
If the name is valid, this is the screen you will get:
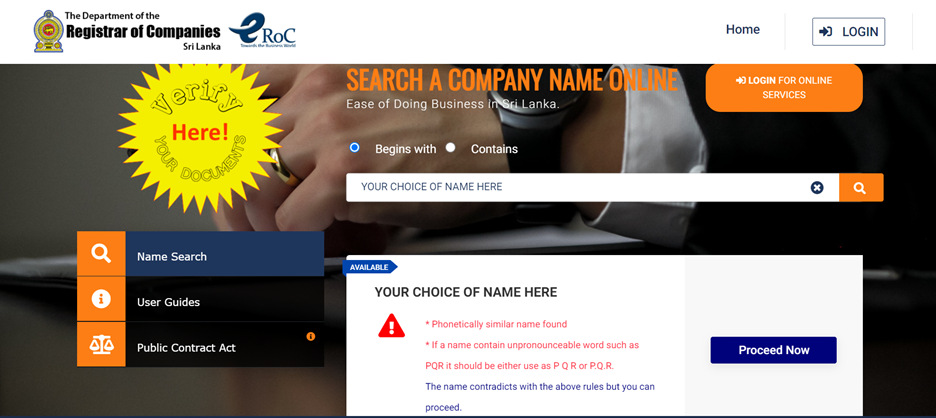
If the selected name is available, create an account (mandatory) and move on to step 3.
2. Create An eROC Account
This step is mandatory for everyone who wants to register their business through online channels.
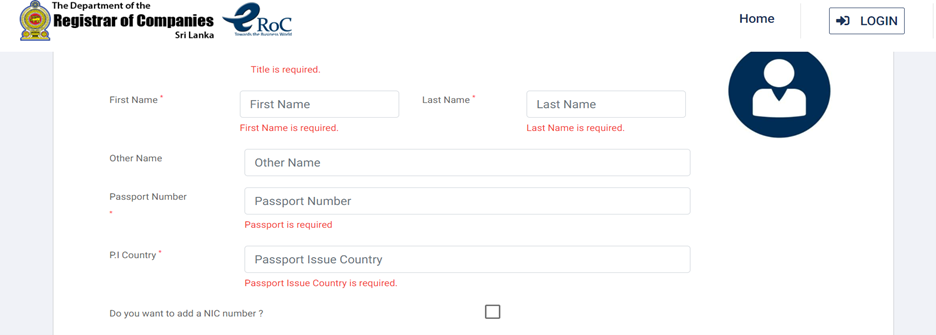
To create your account, go to the “Login for online services” button -> “I’m new to ROC system. Register” -> “Sri Lankan / Non Sri Lankan” (Choose whichever is applicable).
Fill out the form that appears on screen. It should look something like this:
3. Reserve The Name You Chose
Do this by logging in and then clicking on the “Name Reservation” button on the website. Enter the name you chose into the bar, and if any additional details are required, the website will let you know. Choose your desired company type and hit “enter”.
The name reservation button will be to the left of your “dashboard”.
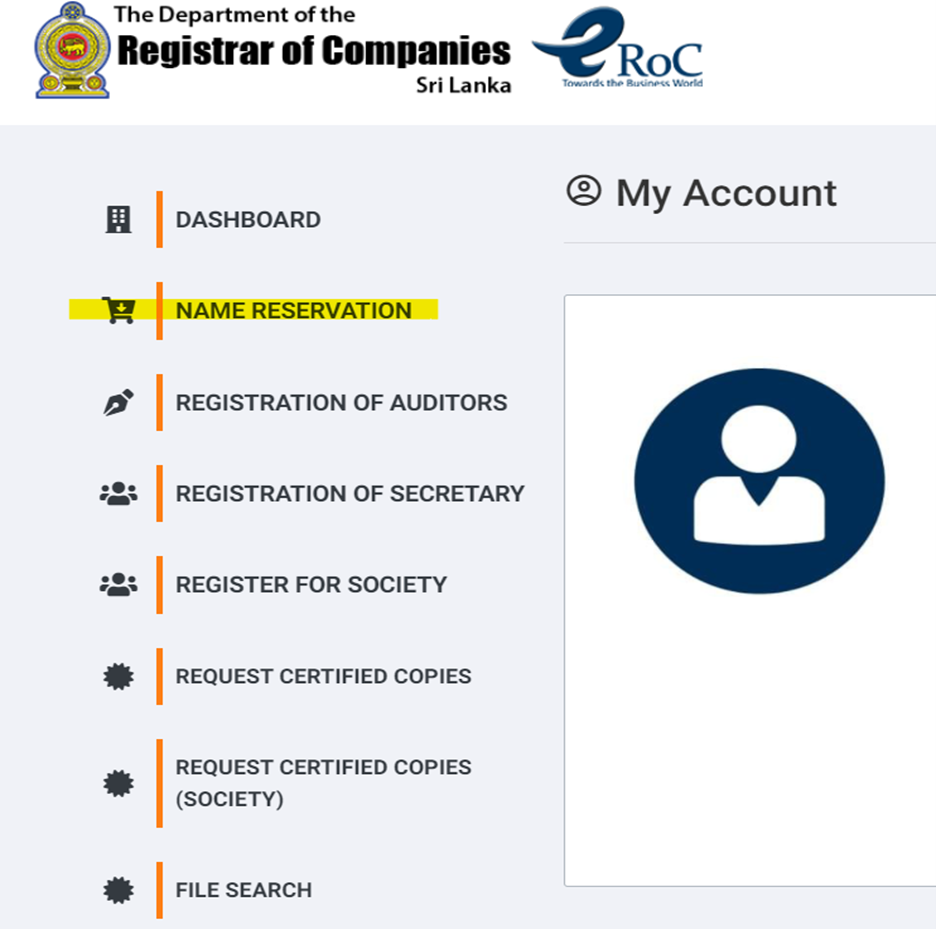
If the company name is available, you will get a pop-up dialog box with a blue “Proceed Now” button on it. Click the button to register the company name.
You will need to pay a fee. This would be indicated directly above or below the “Proceed Now” button.
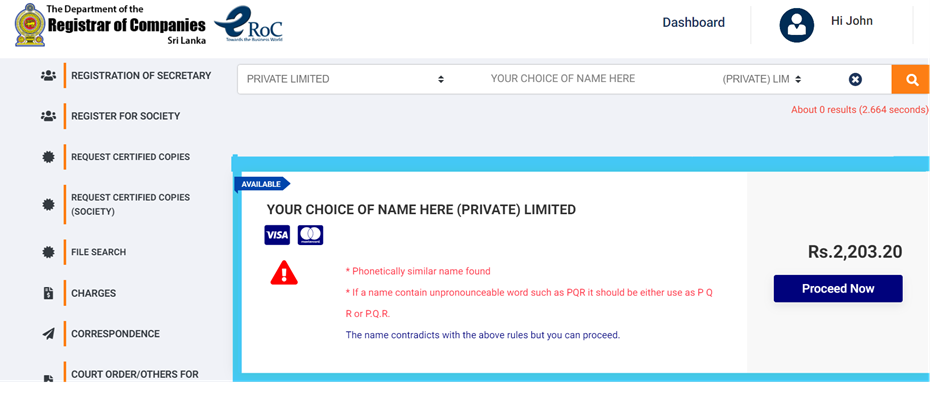
If successful, you will receive an email containing both a receipt and a confirmation of ownership of the name. Currently, the amount is Rs. 2,203.20.
Tip: Choose a website name similar to your business name for professionalism.
4. Confirm All Details
The last step is to fill out the following details:
- Physical Office Address (has to be registered).
- District and Province.
- Which Divisional Secretariat Division you come under.
- Your Grama Niladhari Division.
- Postal Code.
- E-mail address + Contact information for the company.
In addition to the above details, this is an extra form that you have to fill:
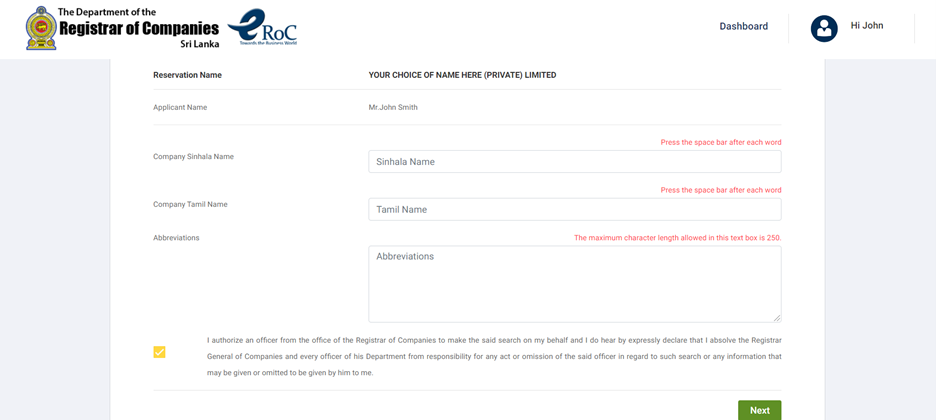
Points 1 through 5 are dependent on the location of your physical office location.
5. Update The Company Details
You will now be required to fill in company details — but worry not, for the website gives detailed information on how to go about doing this.
The things you have to update (in this order) are:
- Company director names.
- Company stakeholder names.
- Company secretary names. (Points 1,2, and 3 will all be filed under the “stakeholders” tab).
Bear in mind that your company secretary must have an NIC number for you to proceed.
6. Fill Out The System Generated Forms
The computer will now generate 3 forms for you to fill out (Form1, Form 18, and Form
19). You will have to download and e-sign the forms, then re-upload them. The system only accepts files in a PDF format.
The forms cost Rs. 4000, 2000, and 2000, respectively. Add 8% VAT to the total.
After you’re done filling out the forms, you will be asked to submit your articles of association.
You may choose to accept the standard articles of association (Table A, Companies Act, Sri Lanka) or draft your own articles of association. The Companies Act can be accessed here.
7. Pay The Fees + Issue Public Notices.
You will now be taken to a secure payment portal where you will be asked to pay the total fees, which should come to about 11000/- Rs.
You will be allowed to pay via either a debit or credit Visa/ MasterCard.
The last step is to publish a small article in local papers. You will be required to include the company name, registration number, contact details, and the registered office address.
You will need it printed in one issue of The Gazette, and in one paper each in English, Sinhala and Tamil.
That’s it! You’re done — congratulations. Now that you know how to get your company registered, you will most likely need a website. This is made up of buying a domain name and a web hosting plan. Better yet, try to get a web hosting plan with a free domain — there are loads of them out there.


GIPHY App Key not set. Please check settings